|
In this tutorial you will learn to export scenes from blender to
CorEngine PAK format. I will not be showing how to build a scene in
blender, because there are a lot of better tutorials for that online
(google!). I assume that you somewhat know how to use blender already. Also
note that we will be using blender 2.49 for this tutorial. However,
the blender 2.5 exporter is available in the same folder as the 2.49 and
works as an add blender 2.5 add on. Google for how to install and use
blender 2.5 add ons.
Step 1: Getting the tutorial resources
I assume you have already gotten yourself the CorEngine Development Kit,
but if not, then head to
http://CorEngine.sf.net and get yourself a one! The CorEngine
Development Kit contains the blender export script we will be using in this
tutorial.
Step 2: Finding the export script
The export script is located in the tools folder of the
development kit. The file name of the export script is
io_export_corengine_pak.py. The more experienced blender users
might notice that you can just drop the export script to the scripts folder
of blender and it will show up in the export menu, but for the beginners, I
will just show how to open up the script in blender and run it, since
sometimes it is a pain to find blenders scripts folder on your OS.
Step 3: Running the script in Blender
First we need to open up blenders text editor. You can find it in the Window Types menu:
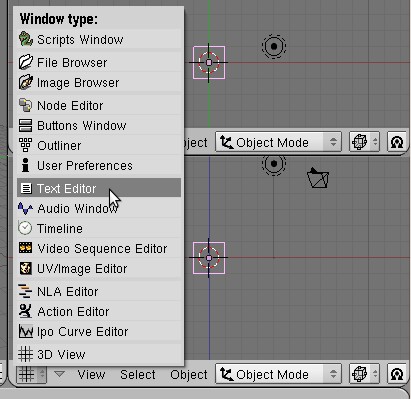
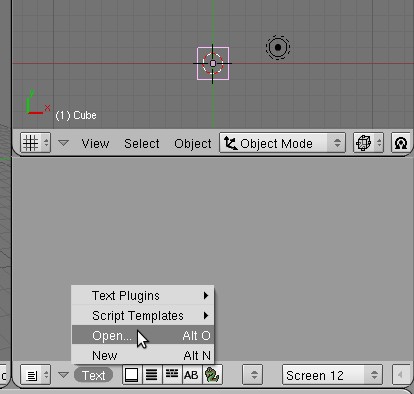
Next we need to open up the io_export_corengine_pak.py export
script in the text editor:
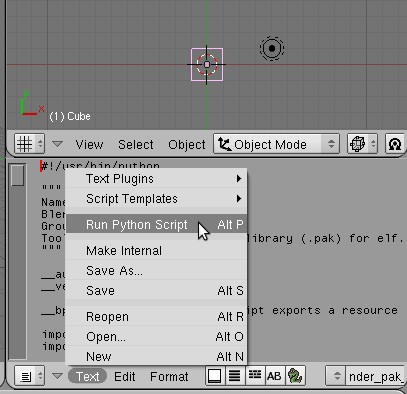
Now we can run the script.
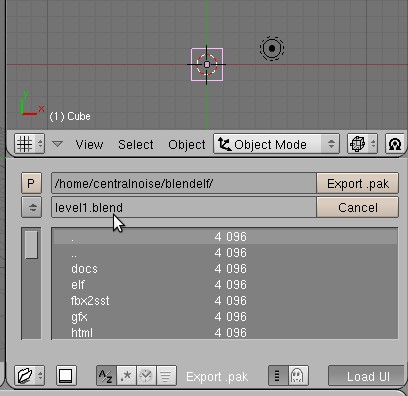
The script will open up a file browser for you so that you can save the
PAK file to the preferred location. NOTE: The default file
extension will be .blend in the file dialog, but you will have to
rename it to .pak for CorEngine to detect the file when you open it
with Engine.LoadScene.
Also bear in mind that if you don't have atleast one camera in the
scene, the you will have to create the camera yourself in a script.
Othervise CorEngine won't render anything. So just to save you some effort,
go ahead and create camera to your scene if you don't already have a one in
it, and CorEngine will automatically assign the first camera it finds in the
scene to the active camera.
Step 4: Defining physics and collision for CorEngine
The Blender 2.49 python API doesn't allow access to the physics and
collision setting of an object, so we have to specify them with properties.
First you have to find the Logic buttons in blender:
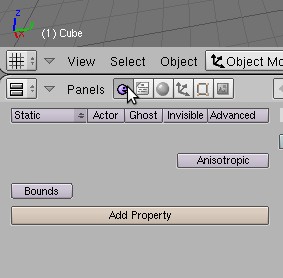
You see the big Add Property button there? Needless to say, you
can add an property to the currently selected object with it. Lets set the
shape for our object with it.
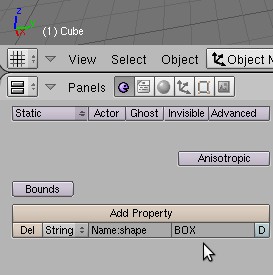
We just defined a poperty of type String with the name
shape and value BOX. The exporter will detect this and set
the objects shape to BOX. Since we didn't define the mass
property, our object will be static because the default mass is 0.0. Here
are the available properties and values for them:
- shape - type String, available values [BOX|SPHERE|MESH|CAPSULE_X|CAPSULE_Y|CAPSULE_Z|CONE_X|CONE_Y|CONE_Z]
- mass - type Float, a positive floating point value
- lin_damp - type Float, a positive floating point value
- ang_damp - type Float, a positive floating point value
Step 5: Using normal and displacement maps
Here is a self descriptive picture of the texture settings you have to
enable for normal mapping and displacement mapping:

Also if you want to use a specular map, enable the Spec button
for it. Note that all specularity will go through the specular map in
CorEngine and not like in blender which combines the normal specularity and
the specular map by default.
Step 6: Defining scripts for objects for CorEngine
First we have to create script in blender. Go to the text editor and
click on Text -> New. NOTE: ALL SCRIPTS MUST END WITH ".lua".
Othervise the exporter won't recognize it as a lua script.
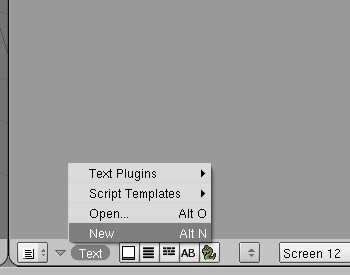
Then we have to name the script, lets name it myscript.lua

Next we just have to create a property called script of the type
String and set its value to the name of the script.
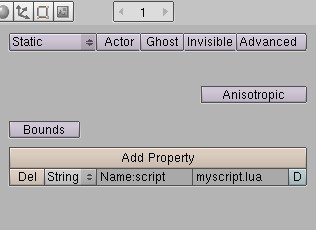
Thats all about scripts. If you did it right, the script will be
exported to CorEngine, and it will run on each frame for the specified node
(camera, entity, light) ;).
Step 7: Armatures
When exporting armature from blender to CorEngine, there is only one
thing you have to take into account. The position and the orientation of
the armature MUST BE EXACTLY THE SAME with the entity the armature
is deforming. Otherwise the animations won't look right.
Thats it! I hope you enjoyed the tutorial, and if you have any comments
about it, please post to the
forums.
|